Classic icebox cake
The dessert that made Famous Chocolate Wafers a cult pantry item—layers, chill, slice. No oven required.
Shopping list
Recipe essentials
Six items readers add to cart before assembly day.

Famous Chocolate Wafers 9 oz
The classic yellow sleeve with roughly 24 thin dark-chocolate wafers—still the benchmark for icebox cakes.
Check Price
Famous Chocolate Wafers 9 oz
Same iconic 9 oz tray from a top Amazon listing—check seller freshness dates before holiday baking.
Check Price
Simply Organic Vanilla Extract
Pure Madagascar vanilla extract that rounds whipped cream without overpowering dark cocoa layers.
Check Price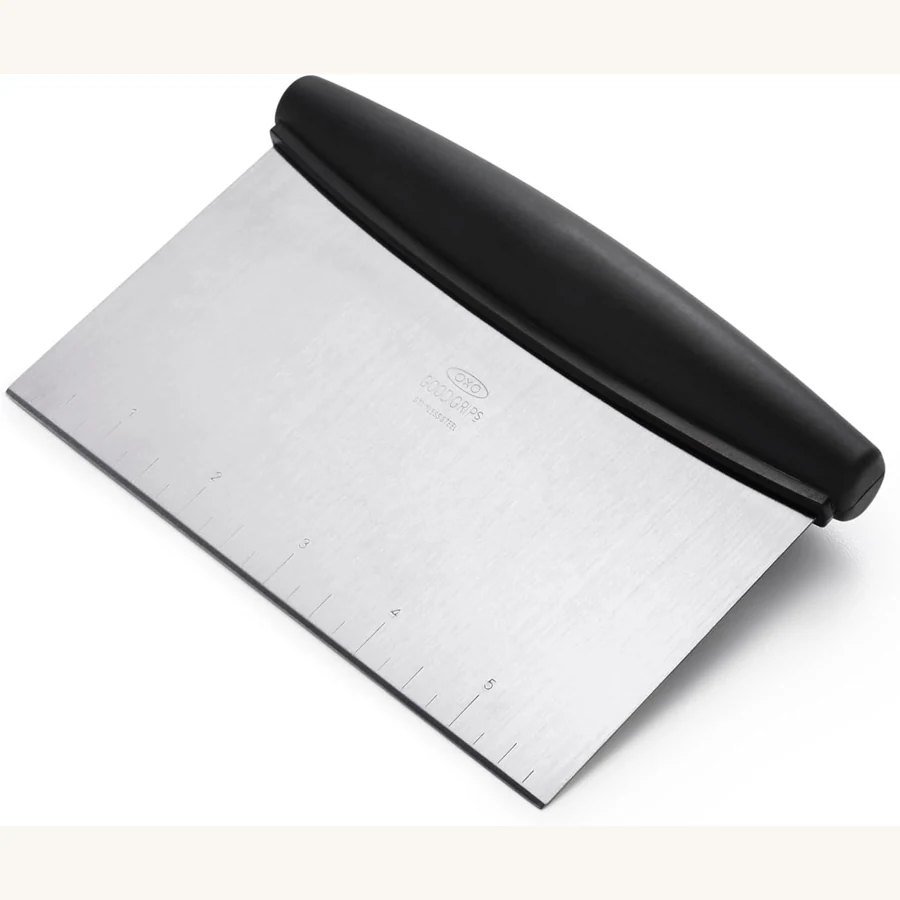
OXO Scraper & Chopper
Stainless scraper spreads cream evenly across wafer stripes without dragging cookies out of line.
Check Price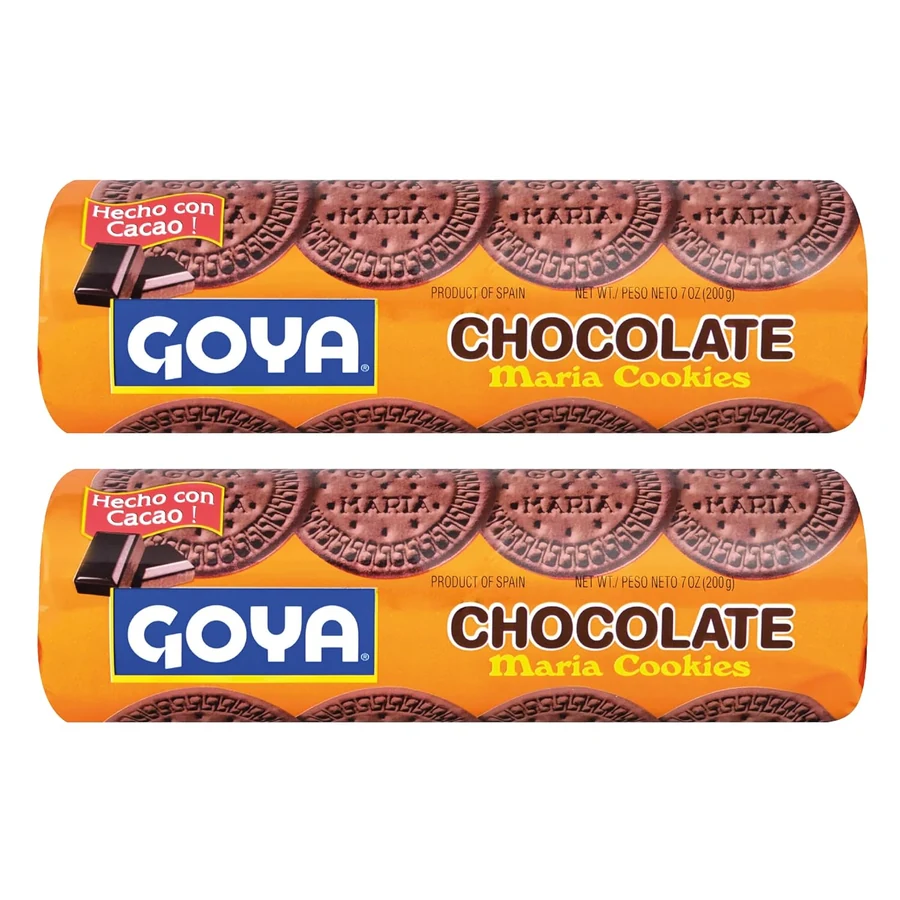
Goya Maria Chocolate Cookies
Thin crisp chocolate wafers bakers reach for when the classic Famous box is out of stock online.
Check Price
Chocolate Ice Cream Wafers
Rectangular chocolate wafers without filling—useful reference size when comparing thin-cookie substitutes.
Check PriceIngredients
- 2 boxes Famous Chocolate Wafers (about 48 cookies)
- 2 cups heavy whipping cream, cold
- 3 tablespoons powdered sugar
- 1 teaspoon pure vanilla extract
- Pinch of fine salt (optional, balances sweetness)
Serves 8–10. Prep time 25 minutes plus overnight chilling. No baking required.
Equipment
You need a 9×5 inch loaf pan, stand or hand mixer, offset spatula and plastic wrap. A sharp chef's knife wiped clean between slices finishes the job. Read product details if you are new to wafer dimensions.
Step 1: Whip the cream
Chill your bowl and beaters ten minutes. Pour cold heavy cream into the bowl and beat on medium until ribbons form. Add powdered sugar, vanilla and salt. Continue to soft peaks—cream should mound gently, not stand stiff. Over-whipping makes layers slippery and hard to slice.
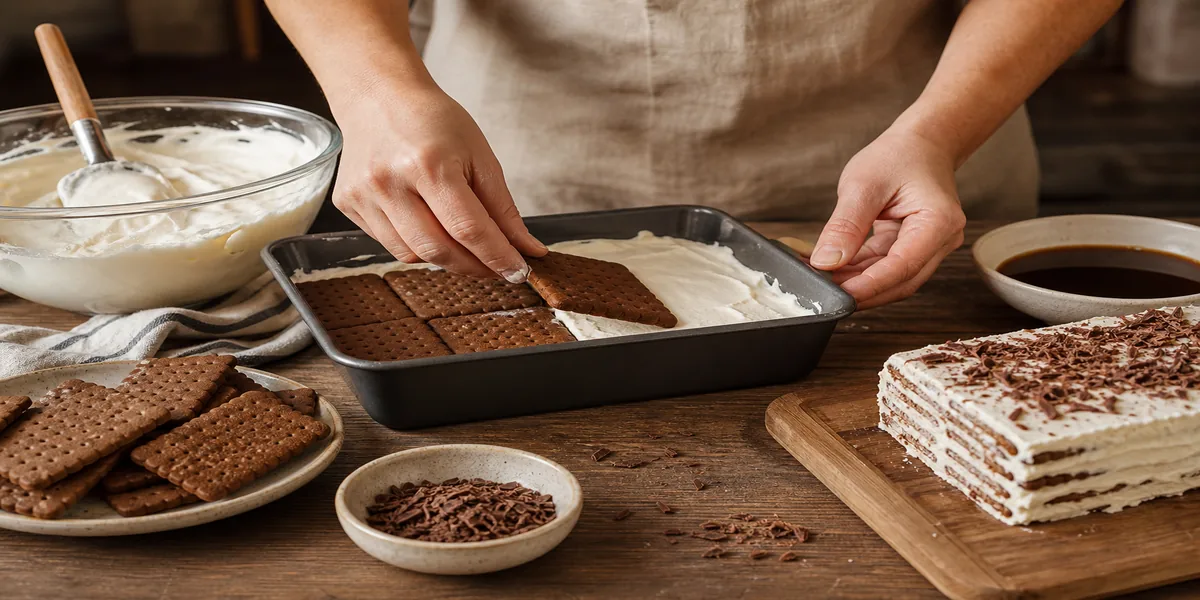
Step 2: Line the pan
Lay overlapping sheets of plastic wrap inside the loaf pan, leaving overhang on both ends. This sling helps you lift the finished cake to a platter. Spread a thin base layer of cream—about half a cup—before the first wafers touch the pan.
Step 3: Build layers
Place wafers flat in a single layer, edges touching. Spread cream evenly with your spatula—roughly three tablespoons per layer. Repeat until the pan is full, ending with cream on top. Reserve six to eight wafers for the exterior stripe if you want the classic look.
For vertical stripes, stand wafers on their long edge against the pan walls before filling the center. Press gently so cream anchors them. This technique mirrors vintage magazine photos and impresses guests at potlucks.
Step 4: Chill overnight
Cover cream directly with plastic wrap. Refrigerate at least 8 hours; 24 hours is better. The wafers absorb moisture and fuse into a sliceable cake. Freezing two hours before serving firms layers further if your fridge runs warm.
Step 5: Slice and serve
Lift the cake using the plastic sling. Transfer to a cutting board. Wipe your knife with a damp towel between cuts for clean stripes. Serve chilled—this dessert wilts quickly in summer heat.
Variations worth trying
Fold a tablespoon of cocoa into the cream for mocha stripes. Add espresso powder for depth. Swap half the cream for mascarpone for Italian flair. For pie crust crumbs, pulse leftover wafers in a food processor—see our homepage for crust ideas. Out of wafers? Check substitutes before you improvise blindly.
Troubleshooting
Soggy slices: cream was over-whipped or chill time was too short. Dry pockets: wafers overlapped with gaps—press cream into seams. Cake slumps: pan was overfilled; reserve wafers for snacking instead. Share results on our Reviews page so other bakers learn from your trial.
Make-ahead timing
Assemble up to 24 hours ahead for best texture. The cake holds well wrapped in the refrigerator for three days; flavors meld pleasantly on day two. Do not freeze the finished cake—the cream weeps upon thawing. You may freeze unopened wafer boxes instead and bake assembly day fresh.
Presentation ideas
Dust cocoa powder through a fine sieve for a matte finish. Add chocolate shavings or candied curls on top just before serving so they stay sharp. Pipe extra whipped cream rosettes along the long edge if you skipped vertical wafers—guests still get a celebratory look without structural fuss.
Scaling for crowds
For twelve servings, build in a 9×13 inch pan using three boxes of wafers and one quart of cream. Increase sugar proportionally. Chill an extra four hours because the larger mass takes longer to set. Slice into small rectangles—this dessert is rich, and modest portions disappear faster than you expect at parties.
Food safety basics
Whipped cream desserts require continuous refrigeration below 40°F. Do not leave assembled cakes on a buffet more than two hours in warm rooms. If transporting, use an insulated bag with ice packs and keep the cake level so cream does not shift layers. When in doubt, serve straight from the refrigerator and return leftovers promptly.
Clean knives and spatulas matter more than people assume. Residual savory flavors from earlier prep can taint delicate cream. Wash tools with mild soap, rinse well and dry before you start whipping.